0. Creating Requests
Digitisation requests can be created via:
- Course Resources Lists (Lecturer front-end method)

- Click the three dots button to the right of a reading list item
- Select 'Request digitisation'
- Complete and submit the request form
- The request is automatically pre-linked to the list item
- The start and end dates are automatically pre-set based on the list's time period
- The course information is automatically pre-filled based on the list's hierarchy code
Digitisation requests can be created via:
- Talis Stand-Alone Request Form (Librarian back-end method)
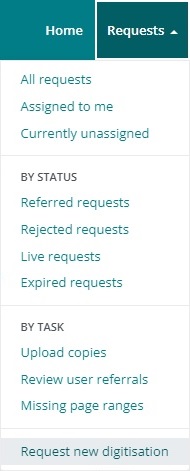
- Click 'Requests' in the Talis menu bar
- Select 'Request new digitisation' at the bottom of the drop down
- Complete the resource information in the request form and click Next
- Enter the time period dates and course information the digitisation is intended for
- Check the Course Resources List if you are unsure of the course details
- Check the Time Periods Chart if you are unsure of course dates
- After the request is submitted, link it to the required reading list item
- Find the item on the Course Resource List
- Click the three dots button to the right of the resource
- Select 'Share item' at the bottom of the drop down, and copy the link
- Click 'Link to reading list' (bottom right of the request) and paste the link
- Test the link is correct by click 'View item in reading list', then 'View list'
- A 'View online' button should be to the right of the reading list item
Digitisation requests can also be activated through:
- The Rollover process (Semester changeover preparation)
1. Accessing Requests
After a request is created, the system 'Concierge' works through a series of steps to automatically process it.
- assessing if the request complies with the Digitisation limits of AUT's 'Universities Licence' from CLNZ
- identifying the resource → checking AUT Library holdings, edition history, and if there are any existing scans
If the Concierge:
- can process the request using the information available, the request is automatically fulfilled
- can determine the request does not comply with copyright, the request is automatically rejected
- cannot automatically process a step, the request is referred to a Librarian to manually process
To access Referred requests:
- Click 'Requests' in the menu bar, and select 'Referred requests'
- Requests are listed newest to oldest. Find the oldest unassigned request on the last page.
- Open the request by clicking the request ID number on the left
Next see Identifying Requests
To access Rejected requests:
- Click 'Requests' in the menu bar, and select 'Rejected requests'
- Open the request by clicking the request ID number on the left
Next see Identifying Requests
2. Identifying Requests
Before processing a request:
- Click 'Assign', then 'Assign to me'
- Check if the requested item has a 'Note for Library' on the associated Course Resources List (or Review)
Then check if the requested item is:
- Out of Print
- Outside Copyright
- Open Access - has a Creative Commons Licence
- Excluded from AUT's Universities Licence
If none of these apply, see Processing Requests
If a book you need to scan is Out of Print:
- it is no longer commercially available in print
- it cannot be reprinted or sourced in time for the course
Contact the Copyright Advisor to request permission from CLL to copy the Out of Print work.
- With permission, students in the course can be provided with a copy of the whole work.
- Permission must be obtained before the Out of Print work is scanned and provided to students.
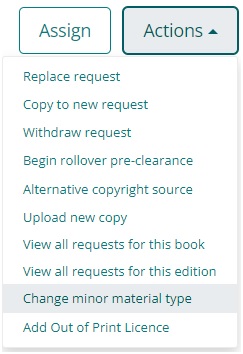
Once an Out of Print Licence has been obtained:
- Click Actions on the Talis request, select Add Out of Print Licence
- Add the 'Out of Print Licence Number'
In New Zealand, copyright on literary, dramatic, musical and artistic works* lasts for the lifetime of the author(s) + 50 years from the end of the calendar year in which the last surviving author dies.**
After this time, a work is Outside Copyright and there are no copying limits.
When uploading a copy of a work that is Outside Copyright:
- click Alternative Copyright Source
- select 'Other' as the 'Source'
- enter 'Public domain' as the 'Specify source of copyright clearance'
Note: Parliamentary bills, Acts, debates and reports by select committees or royal commissions are always Outside Copyright
*Typographical arrangements of editions (choice of typeface and arrangement of text) can be an entirely separate copyright. This expires 25 years from the end of the calendar year in which the edition was first published.
**With the signing of the NZ-EU Free Trade Agreement, copyright in New Zealand will be extended to the lifetime of the author + 70 years from the end of the calendar year in which the last surviving author dies. This will come into force from ~2027, bringing New Zealand in line with international copyright standards.
There are six different Creative Commons Licences each allowing non-commercial copying* of the entire work:
- CC BY-SA
- CC BY-NC
- CC BY-NC-SA
- CC BY-ND
- CC BY-NC-ND
When uploading a copy of a work with a Creative Commons Licence:
-
click Alternative Copyright Source
- select 'Other' as the 'Source'
- enter the Creative Commons Licence as the 'Specify source of copyright clearance'
*Open Access does not mean copyright free.
Some resource types and works are specifically excluded from AUT's Universities Licence (but not the Copyright Act 1994):
- Bible Society in New Zealand
- Janet Frame Literary
- Scion Research
- Standards New Zealand
See the full list of excluded resource types
See the full list of specific excluded works
Contact the Copyright Advisor to obtain permission from the copyright owner to copy their excluded work.
3. Processing Requests
 Cannot identify resource:
The Concierge needs an ISBN to work with:
- Find the resource's ISBN on Worldcat or an alternative source
- Click 'Actions' in the top right, then select 'Edit & resubmit'
- Click 'Lookup by ISBN', enter the missing ISBN, then submit the form
If the resource does not have an ISBN (eg. predates 1970):
- Click 'Accept' in the grey status box, complete the 'Manually clear request' form', and click 'Accept request'
All automated actions and manual actions are recorded in the worklog below the request information
Cannot determine latest edition:
The Concierge needs to know if we will be using an older edition:
- Find the resource on Worldcat, click 'View all formats and editions'
- Click 'Accept' and select the correct option in the drop down
- If the resource is not the latest edition, submit 'Lecturer's preference' as the 'reason for accepting older edition'
All automated actions and manual actions are recorded in the worklog below the request information
Manual rights clearance required:
 The Concierge needs to know the page numbers of the requested chapter/section to calculate if it is copyright compliant:
- Find a Table of Contents online, or a reference with the page numbers
- Click 'Actions', then select 'Edit & resubmit'
- Enter the missing page numbers in the form, then submit
All automated actions and manual actions are recorded in the worklog below the request information
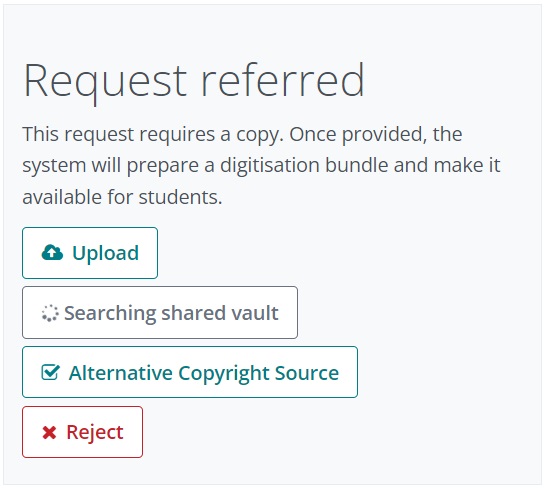
Copy Pending: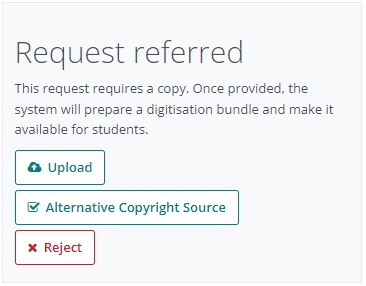
The Concierge has now verified the request is copyright compliant.
The requested resource can now be sourced, scanned, and uploaded.
- If the Concierge has suggested an electronic copy in the metadata:
- Check if it is correct/suitable/accessible and can be used instead

If yes, link it to the reading list item and reject the request due to there being an existing electronic copy
- If the lecturer offered a personal hardcopy or PDF scan, use their copy:
- if it is not at the City Campus, email LCE staff at their campus to scan it, or transfer it to the City to scan it. Email the lecturer when it is ready to collect.
- If the resource is held by AUT library in print, retrieve from the shelf and scan:
- if it is not at the City Campus, email LCE staff at the campus to scan it, or transfer it to the City to scan it
- if it is on loan, place a hold request on the item and scan when it is returned - or Interloan if the digitisation is urgent
- If the resource is not held by AUT library or offered by the lecturer, request an interloan of the item via Tipasa or VDX
- request a copy of the requested chapter/section/article, not the whole book/journal for scanning
All automated actions and manual actions are recorded in the worklog below the request information
Existing electronic copy available
The Concierge has checked AUT's holdings, and needs to know if we will use our electronic copy instead of a digitisation, or still scan from a print copy.
If the item has a 'Note to Library': the existing electronic copy access is too limited for in-class use, click 'Accept', then 'Source from print copy'.
Otherwise, check if the existing electronic copy is correct/suitable/accessible:
> If we do not have access → Select 'Source from print copy'
> If we do have access → Link the electronic copy to the list item and reject the request:
- Go to the Course Resources list, find the item, click the three dots button to the right and select 'Edit'
- Add a web address field, enter the weblink to the electronic copy
- Use a permalink, ezproxy link, or stable link, and make sure the 'Online resource' box is ticked
- Test the 'View Online' button that now appears to the right of the reading list item
- When rejecting the digitisation request, inform the lecturer the existing electronic copy has been linked to their list
All automated actions and manual actions are recorded in the worklog below the request information
Source needs to be acquired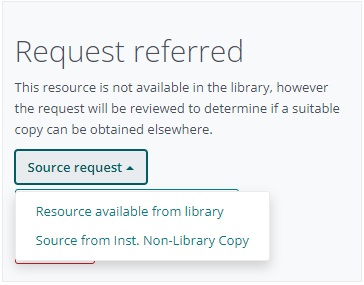
The Concierge has checked AUT's library holdings, and needs to know if we want to obtain a scan from another source/institution:
If the Concierge has suggested an electronic copy in the metadata:
- Check if it is correct/suitable/accessible and can be used instead
If yes, link it to the reading list item and reject the request due to there being an existing electronic copy
Otherwise, double check AUT's library holdings:
- If not held (or if a lecturer copy or interloan will be used) click 'Source request' → 'Source from Inst. Non-Library Copy
- If a print copy is held, click 'Source request' → 'Resource available from library' → complete 'Manually Request' form
- If an eBook is held, reject the request and link the eBook to the list item (unless 'Note to Library' says it is too limited)
All automated actions and manual actions are recorded in the worklog below the request information
Confirmation of vault copy needed:
The Concierge has checked the Shared Vault* and needs to know if we want to use an existing copy it has found:
• Click the '# shared vault matches' button
• Check the Preview of each match
• Choose which scan you would like to use and and click 'Use selected scan'
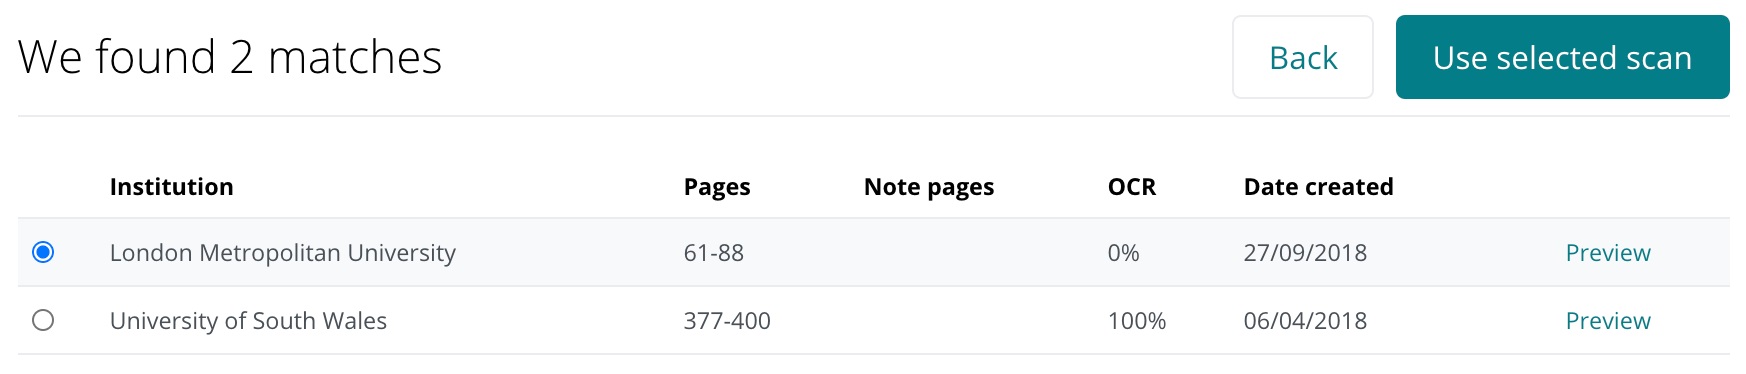
*The Shared Vaults contains all scans ever uploaded to Talis by any University in New Zealand
All automated actions and manual actions are recorded in the worklog below the request information
REJECTED: Duplicate Request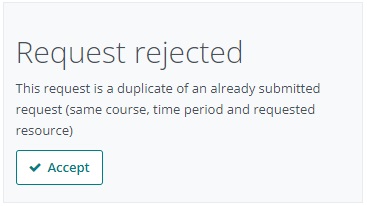
The Concierge has determined there is already a Live scan of the resource for the same course code and time period. Check if the existing scan is correctly linked to a reading list item:
- Click 'Actions', and select 'View all requests for this book'
- Click the 'Statuses' filter and select 'Live'
- Open the duplicate request that is Live for the same course code
- Click 'View item in reading list' to check how the digitisation is linked
- If an Error screen appears, the link between the Live Digitisation and Course Resources list is broken
- On the Live Digitisation, change the requester email to your own and click 'Actions', select 'Withdraw request'
- On the rejected duplicate request, click Accept. Tell the system the duplicate has been removed.
- If the Live Digitisation does link to a Course Resources list, check the time period of the list
- If it has a past time period, withdraw the Live Digitisation and accept the Rejected Duplicate
- If it has the correct time period, leave the Rejected Duplicate request as rejected
- If it has a current (green) but different time period, contact the Course Resources Specialist
REJECTED: Invalid Request
The Concierge cannot process the request at all because:
- insufficient information has been provided
- OR the information has been submitted incorrectly
Click 'Edit & resubmit' → enter the information that is missing OR move the existing information into the correct boxes
If you are unable to determine what the resource is supposed to be, contact the Requester for clarification
REJECTED: Existing electronic copy available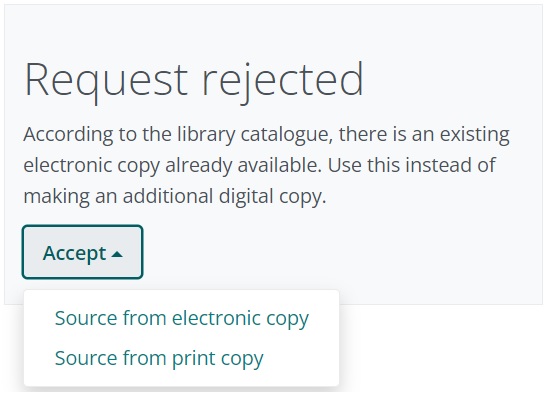
The Concierge has detected an existing electronic is available:
- If a 'Note to Library' says the eBook is too limited for in-class use:
- Click 'Accept', then 'Source from print copy'
- Otherwise, check if the electronic copy is correct/suitable:
> If yes, link the electronic copy to the reading list item:
- Leave the Rejected request as rejected.
- Go to the Course Resources list, find the requested item
- Click the three dots button and select 'Edit'
- Add a web address field, enter the weblink to the electronic copy
- Use a permalink, ezproxy link, or stable link, and make sure the 'Online resource' box is ticked
- Test the 'View Online' button that now appears to the right of the reading list item
> If no, click 'Accept', then 'Source from print copy'
REJECTED: Exceeded copy limit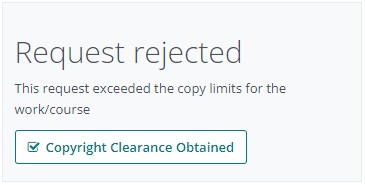
The Concierge has determined the requested number of pages is beyond the copying limit for the resource type. Check:
- What the digitisation limit is
- How much of the resource has already been uploaded
- If an eBook can be purchased
- OR if the requests can be adjusted to fit the limit
- Click 'Actions', select 'View all requests for this book', then filter 'Statuses' to 'Live requests'
A) If there is already a Live request for the resource for the course:
Check if an eBook is available to purchase:
- If yes, request a Gobi purchase, and link the eBook to both reading list items with requests (withdraw the Live request)
- If no, check if the Live digitisation has been viewed/downloaded yet → see the 'Analytics' at the bottom of the request
> If it has had one or more views/downloads = the Live request cannot be removed/altered to extend the limit
- the number of requested pages on the Rejected request must be reduced to fit within the limit
> If it has had zero views/downloads = the Live request can be removed/altered to extend the copy limit
- Check if any unneeded pages can be removed/omitted from the requests so they fit within the copy limit:
(eg. title pages, blank pages, images, activity/exercise/question/answer sections)
> If yes (there are unneeded pages that can be removed), edit the requests:
- Rejected request = click 'Actions' → 'Edit & resubmit', alter the page numbers accordingly and submit
- Live request = Download and edit the PDF, click 'Actions' in the request → 'Replace request', alter the page numbers, submit, 'Upload new copy'
> If no (no pages can be removed), only one of the requests can be Live/uploaded for the courses
B) If there are no Live requests for the resource for the course:
Check if the Rejected request is for a full chapter:
- If yes, check 'This is a full chapter' has been ticked in 'Actions' → 'Edit & resubmit'
- If no, check if any unneeded pages can be omitted from the scan to make the request copyright compliant
- eg. title pages, blank pages, activity/exercise/question and answer sections
> If yes, edit the request details: click 'Actions' → 'Edit & resubmit', alter the page numbers accordingly and submit
> If no, check if an eBook is available to purchase:
- If yes, request a Gobi purchase, and link the eBook to the reading list item
- If no, the requested number of pages needs to be reduced to fit within the limit or it cannot be uploaded
- Click 'Actions' → 'Edit & resubmit', alter the page numbers accordingly and submit.
4. Scanning on the Photocopier
Before scanning, check the pages for pen, pencil, or highlighter markings:
- If there are pencil marks, remove them with an eraser then continue to step one.
- If there are pen or highlighter marks, use an alternative copy if multiple are available.
- If pen marks do not intersect with text or image content, scan and remove them during Editing.
To scan a section or selection of non-consecutive pages from a book (or journal):
- Swipe your staff ID card to Log In
- Select the 'Email' icon
- Click the 'Layout Adjustment' tab
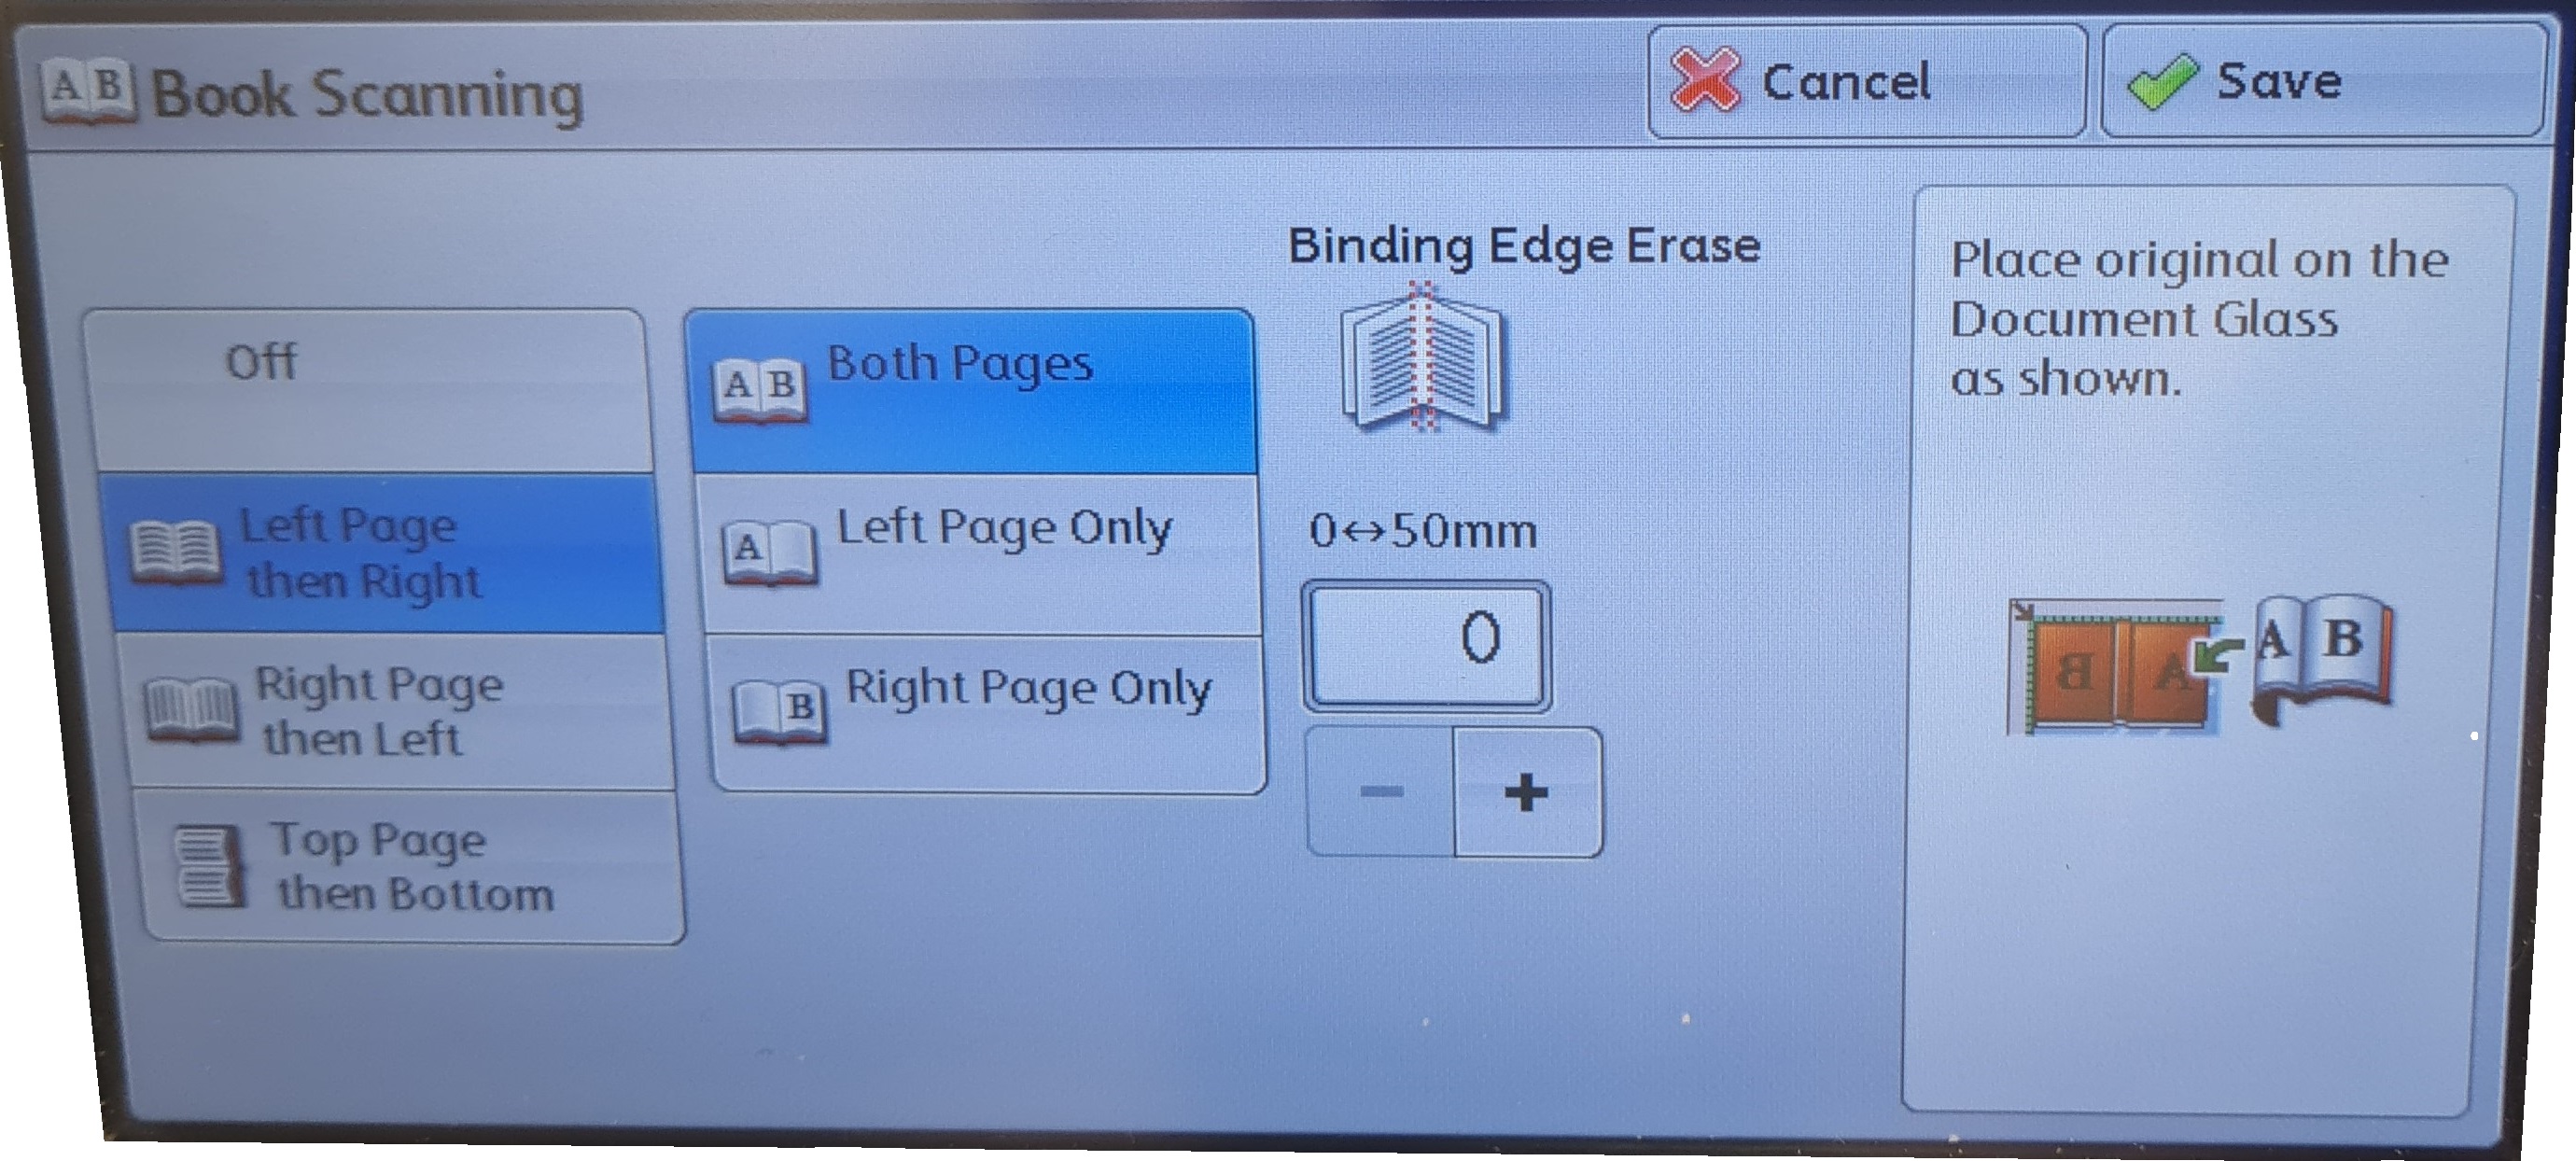
- Select 'Book Scanning'
- Click 'Left Page then Right'
-
This ensures each page is scanned separately, rather than a double page spread.
- Keep 'Both Pages' selected and click Save.
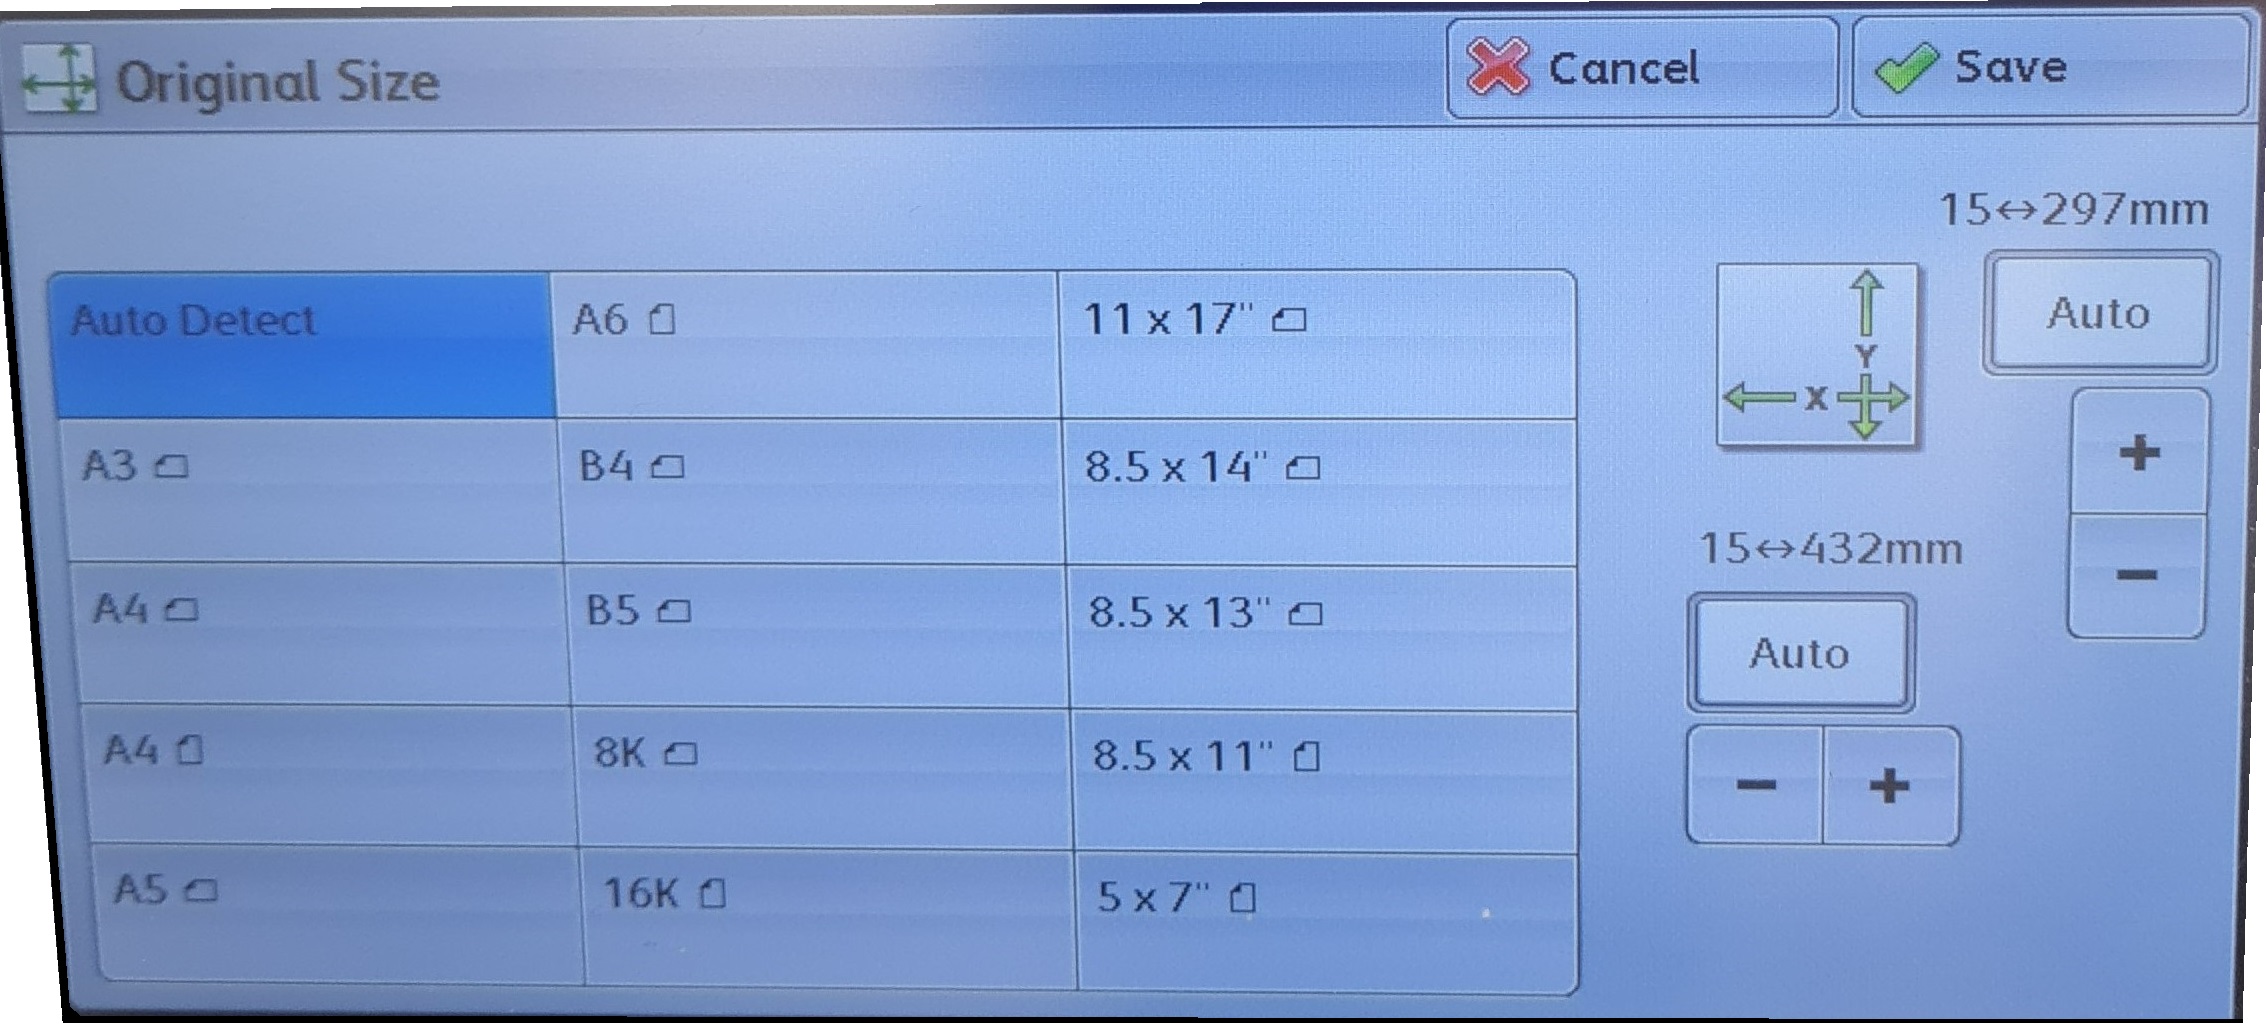
- Select 'Original Size'
- Lay the book open on the required pages on the photocopier window.
- Align the left side page so it is flush with the top left hand corner of the window
- Pull the right side page to right so the book is flat as possible
- Push the spine down with one hand to keep the book in position. Do not remove this hand.
If both pages do not fit on the window: Go to → How to Scan an Oversized Book
- Measure the height of one page and the width of both pages using the ruler around edge of photocopier window.
- Click 'Auto' boxes on the touchscreen to input the measurements in millimeters (255 = 25.5cm), then click Save
- Keep the photocopier lid up, and one hand pushing down the spine during scanning.
- Press the Start button to begin.
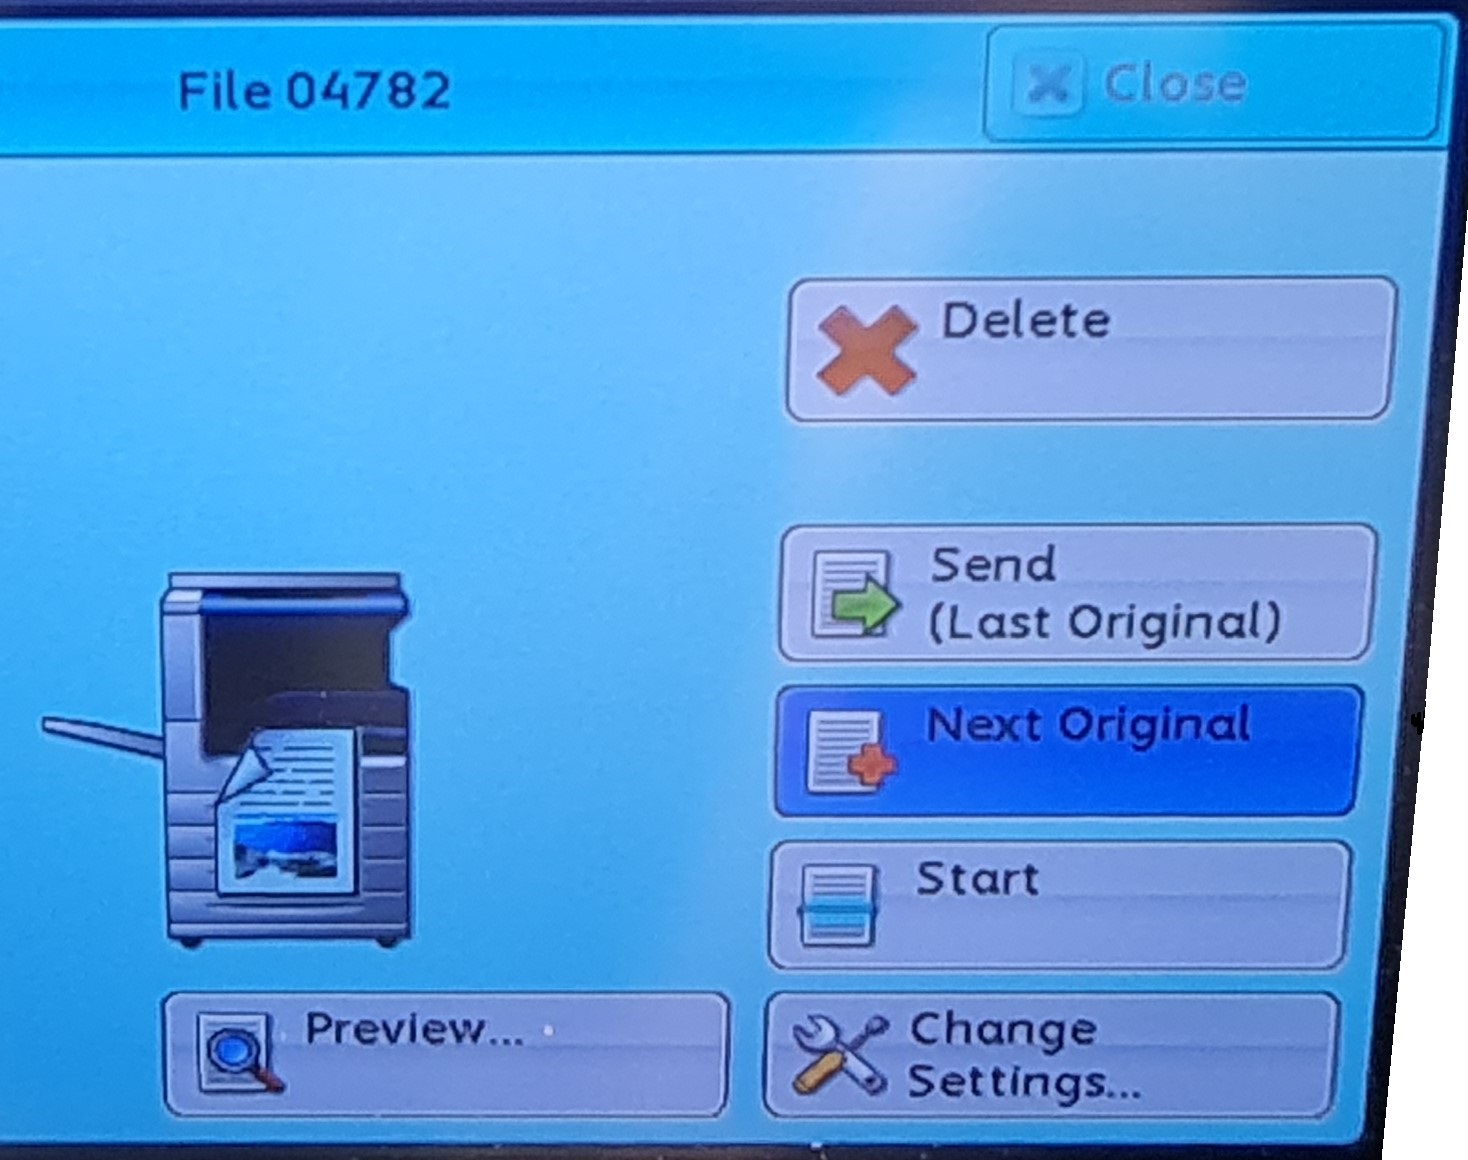
 QUICK. While the first pages are being scanned click 'Next Original'
- This enables you to scan further pages as part of the same PDF
If this button is not pressed while the first pages are being scanned:
- only these first pages will be sent to your email.
- you will need to start again to scan further pages as part of the same PDF.
- When the first pages have finished being scanned, click 'Preview' to check the scan:
- If the preview is fine:
- Click Close in top right and continue to the next step.
- Click Close in top right and continue to the next step.
- If the pages are cut off:
- Click 'Change Settings', then 'Original Size', then 'More'
- Re-measure the book, enter the correct measurements, then click Save.
- Click the Start button to re-scan the pages then check the preview again.
- If the pages are bent, folded, or skewed:
- Close the preview, and adjust your positioning of the book
- Click the Start button to re-scan the pages then check the preview again.
If one page has a big spine shadow due to the book having a thick spine: Go to → How to Scan with Spine Shadows
- To continue, turn to a new page, lay the book flush and flat as before, with one hand pushing down the spine.
- Click the Start button to continue scanning, check the preview again if necessary, and repeat until finished.
- Scan a maximum of 40 non-colour pages, or 20 colour pages at once. Start again to scan further bundles.
- If you scan too many pages at once, the file size becomes too large and fails to send to your email. (All your scanning is lost)
- When you have finished scanning your bundle, click 'Send Last Original' on the touchscreen.
- The scan will be sent to your staff email address as a PDF.
If the book is too large to fit both pages on the photocopier window:
- Measure the height and width of only the left side page using the ruler around edge of photocopier window.
- Click 'Auto' boxes on the touchscreen to input the measurements in millimeters (255 = 25.5cm), then click Save
- Click Book Scanning, set it to Off, then click Save.
- Keep the photocopier lid up, and one hand pushing down the spine during scanning. Press the Start button to begin.
- While the first page is being scanned click 'Next Original'
- This enables you to scan further pages as part of the same PDF
- If this button is not pressed while the first pages are being scanned:
- only the first page will be sent to your email
- you will need to start from the beginning to scan further pages
- Once the first page is finished being scanned, click 'Preview'. Check if the page is cut off or crooked:
- If the preview is fine:
- Click Close in top right and continue to the next step.
- If the page is cut off:
- Click 'Change Settings', 'Original Size', then 'More'
- Re-measure the book while it is flush and flat
- Enter the correct measurements, and click Save
- Click the Start button to re-scan the page
- Check the preview again
- If the page is bent, folded, or skewed:
- Close the preview, adjust your positioning of the book
- Click the Start button to re-scan the page
- Check the preview again
- To continue, rotate the book so the right side page is now upside down on the left.
- Lay the book flush and flat as before, with one hand pushing down the spine.
- Click the Start button to continue scanning, check the preview again if necessary.*
- Repeat until finished, first scanning the right way up, then rotating the book and scanning the adjacent page upside down.
- Scan a maximum of 40 non-colour pages, or 20 colour pages at once. Start again to scan another bundle
- If you scan more, the file size becomes too large and fail to send to your email. All your scanning will be lost.
- When you have finished scanning, click 'Send Last Original' on the touchscreen.
- The scan will be sent to your staff email address as a PDF.
*Do not turn the upside down pages in the Preview the right way up. This will be corrected when editing the PDF.
If the book you are scanning has a thick spine and there are big spine shadows on one page in the scan preview:
- To continue, rotate the book so the pages are upside down.
- Lay the book flush and flat as before, with one hand pushing down the spine.
- Click the Start button to continue scanning, check the preview again if necessary.*
- Repeat until finished, first scanning the pages the right way up, then rotating the book and scanning them upside down.
- Scan a maximum of 40 non-colour pages, or 20 colour pages at once. Start again to scan further bundles.
- If you scan more, the file size becomes too large and fails to send to your email. All your scanning will be lost.
- When you have finished scanning, click 'Send Last Original' on the touchscreen.
- The scan will be sent to your staff email address as a PDF.
*Do not turn the upside down pages the right way up in the Preview. This will be corrected when editing the PDF.
5. Editing in Adobe Acrobat
Before editing, you must install Adobe Acrobat Pro on your computer.
- This version of Adobe Acrobat includes required functions such as Optimal Character Recognition (OCR)
- Contact the Resource Sharing Team Lead for access to this subscription software
- Download the PDF scan/s sent to your staff email address:
- If you created one PDF bundle, save the file with the format: Author_PublicationYear
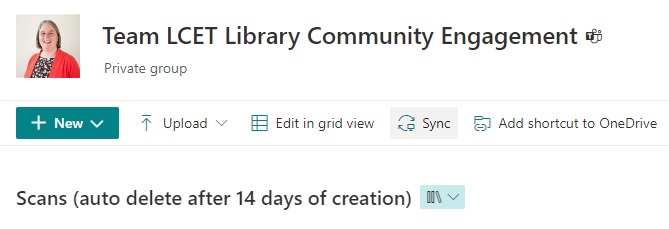
 Save it in the 'Scans (auto delete after 14 days of creation)' Sharepoint folder
- sync this folder with your device for ease of access
- Right-click the downloaded PDF, and select 'Edit with Adobe Acrobat'
- If you created multiple PDF bundles, save the files as: Author_PublicationYear_#
- Save it in the 'Scans (auto delete after 14 days of creation)' Sharepoint folder
- sync this folder with your device for ease of access
- sync this folder with your device for ease of access
- In the folder, select all PDFs you want to combine
- Right-Click, and select 'Combine files in Acrobat'
- Reorder the PDFs by drag-and-drop as needed
- Click Combine in the top right
- Save it in the 'Scans (auto delete after 14 days of creation)' Sharepoint folder

- To improve your editing experience:
- Click View, hover to Page display, and select 'Enable Scrolling'
- Click View, hover to Page display, ensure 'Show Gaps Between Pages' is unticked
- Click 'Scan & OCR' on the right hand menu:
- Select 'AA Recognise Text' at the top
- Click 'In this file' in the drop down
- Click the blue button 'Recognize Text'
- Wait until the process is finished.
- Select 'AA Recognise Text' at the top
This process applies 'Optical Character Recognition' (OCR):
- text becomes highlightable, searchable, and compatible with text to voice software
- This supports students' diverse learning preferences, impairments, or disabilities
- text that was slightly skewed becomes straightened
- any upside down pages are turned the right way up
- If a page is rotated the wrong way after this process, click the page and use the arrow buttons to correct it
When the process is finished click Close.
- Click 'Organise Pages' on the right hand menu:
- Use the slider in the bottom right to Enlarge Page Thumbnails
- Use the slider in the bottom right to Enlarge Page Thumbnails
- If there are unneeded pages in the scan:
- eg. the last page of the preceding chapter
- eg. the first page of the next chapter
- Select the unwanted page and click delete or the Rubbish Bin icon.
- Be careful! Deleting pages cannot be undone by the Undo button in Adobe.
- If you accidentally delete a page you need, restart editing from step one
Click Close when you are finished.
- Zoom out to a whole page view. Scroll through the PDF to check if there are any shadows, marks, or lines. If there is:
- Click 'Edit PDF on the right hand menu
- Wait until the process is finished.
When the process is finished:
- Click on the box containing the shadow/mark/line, or drag a box around it on the PDF
- Check that no text or image content is contained in the box
- If you are not sure, move the box to see what it includes
- Click Edit → Undo or Ctrl+Z to move the box back to it's original position
- If there is no text or image content, Delete the box to remove the shadow/mark/line
- If there is content, select the box, then click the 'Crop Image' button on the right menu under 'Objects'
- Drag the edges of the box to cut off the shadow/mark/line without affecting the text or image content
- If you are unable to delete or crop the box without affecting text and image content - Leave the Mark.
- If pages are different widths:
- Click 'Crop Pages' at the top (while in Edit PDF mode)
- Double click the page that is wider.
- Increase the margin control values until the page is the same width as the one above and below it
To check if pages are the same height:
- Click View, hover on Page Display, and select Two Page Scrolling
- Repeat the above to Crop Pages to the same height if necessary
- When you have finished editing:

- Double check pages:
- are in the correct order
- none are missing
- no text or image content is cut off
- Click the Save button in the top left. The final file should have the naming format: Author_PublicationYear
- Download the PDF scan/s sent to your staff email address:
- If you created one PDF bundle, save the file with the format: Author_PublicationYear
- Save it in the 'Scans (auto delete after 14 days of creation)' Sharepoint folder
- sync this folder with your device for ease of access
- Right-click the downloaded PDF, and select 'Edit with Adobe Acrobat'
- If you created multiple PDF bundles, save the files as: Author_PublicationYear_#
- Save it in the 'Scans (auto delete after 14 days of creation)' Sharepoint folder
- sync this folder with your device for ease of access
- sync this folder with your device for ease of access
- In the folder, select all PDFs you want to combine
- Right-Click, and select 'Combine files in Acrobat'
- Reorder the PDFs by drag-and-drop as needed
- Click Combine in the top right
- Save it in the 'Scans (auto delete after 14 days of creation)' Sharepoint folder
- To improve your editing experience:
- Click View, hover to Page display, and select 'Enable Scrolling'
- Click View, hover to Page display, ensure 'Show Gaps Between Pages' is unticked
- Click 'Scan & OCR' on the right hand menu:
- Select 'AA Recognise Text' at the top
- Click 'In this file' in the drop down
- Click the blue button 'Recognize Text'
- Wait until the process is finished.
- Select 'AA Recognise Text' at the top
This process applies 'Optical Character Recognition' (OCR):
- text becomes highlightable, searchable, and compatible with text to voice software
- This supports students' diverse learning preferences, impairments, or disabilities
- text that was slightly skewed becomes straightened
- any upside down pages are turned the right way up
- If a page is rotated the wrong way after this process, click the page and use the arrow buttons to correct it
When the process is finished click Close.
- Click 'Organise Pages' on the right hand menu:
- Use the slider in the bottom right to Enlarge Page Thumbnails
- Drag and drop the pages into the correct order, including duplicates.
- Compare the duplicate pages. Select and delete the page that has a bigger spine shadow
- Be careful! Deleting pages cannot be undone by the Undo button in Adobe.
- If you accidentally delete a page you need, restart from step one.
Select and delete unneeded pages
- eg. The last page of the preceding chapter/ the first page of the next chapter
- Be careful! Deleting pages cannot be undone by the Undo button in Adobe.
- If you accidentally delete a page you need, you will have to start at step one again.
- Be careful! Deleting pages cannot be undone by the Undo button in Adobe.
Click Close when you are finished.
- Zoom out to a whole page view. Scroll through the PDF to check if there are any shadows, marks, or lines. If there is:
- Click 'Edit PDF on the right hand menu
- Wait until the process is finished.
When the process is finished:
- Click on the edit box containing the shadow/mark/line, or drag a box around it on the PDF
- Check that no text or image content is contained in the box
- If you are not sure, move the box to see what it includes
- Click Edit → Undo or Ctrl+Z to make the box move back into it's original position
- If there is no text or image content, Delete the box to remove the shadow/mark/line
- If there is content, select the box, then click the 'Crop Image' button on the right menu under 'Objects'
- Drag the edges of the box to cut off the shadow/mark/line without affecting the text or image content
- If you are unable to delete or crop the box without affecting text and image content - Leave the Mark.
- If pages are different widths:
- Click 'Crop Pages' at the top (while in Edit PDF mode)
- Double click the page that is wider
- Increase the margin control values until the page is the same width as the pages above and below
To check if pages are the same height: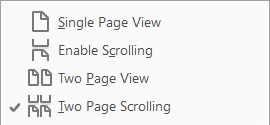
- Click View, hover on Page Display, and select Two Page Scrolling
- Repeat the above to Crop Pages to the same height if necessary
- When you have finished editing:
- Double check pages:
- are in the correct order
- none are missing
- no text or image content is cut off
- Click the Save button in the top left. The final file should have the naming format: Author_PublicationYear
6. Uploading PDFs to Talis
Before uploading, double check
- Pages are not missing, incorrectly ordered, or upside down
- OCR has been applied to the document; the text is highlightable
- The document is named corrected: Author_Year
- The page numbers on the request are correct
- In Talis:

- Click 'Requests' in the menu bar
- Select 'Referred requests'
- Open the referred request awaiting upload
- Click the Upload button in the top left box
Note: See Identifying Requests if it is:
- Out of Print
- Outside Copyright
- Open Access - has a Creative Commons Licence
- Excluded from AUT's Universities Licence
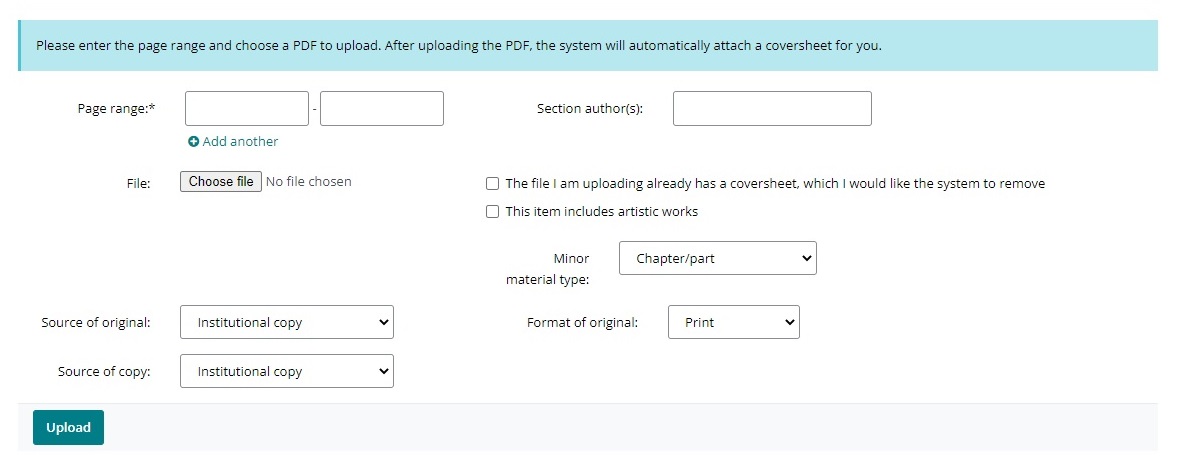
- In the pop-up, enter the:

- page numbers of the scanned PDF if they were not previously added
- section author(s) - if it is scanned from an edited work
- minor material type - usually a chapter or article
- format of original - print or electronic
- source of original
- Institutional - held by library
- Academic/departmental copy - personal copy supplied by lecturer
- BL Fee Pay copy -
- Other HEI - copy is from the Shared vault or sourced via interloan
- The 'Source HEI name' is the institution it was sourced from
- Do not tick
- The file I am uploading already has a coversheet, which I would like the system to remove
- This item includes artistic works
- Click 'Choose file'
- Select the correct file from the 'Scans (auto delete after 14 days of creation)' folder
- Click upload
- When the PDF is uploaded, the box will say: 'Request success'
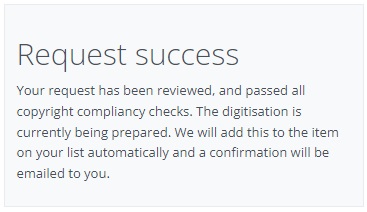
- The successful upload is recorded in the worklog history
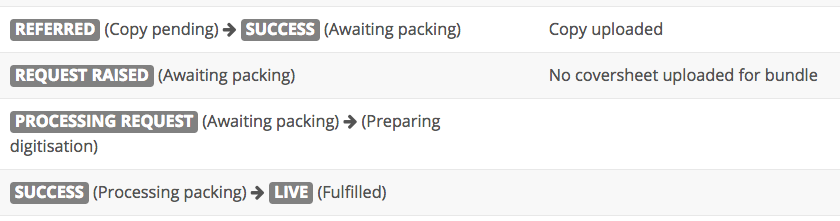
- A coversheet is automatically generated using the request information and added to the start of the bundle
- A 'View online' button will appear to the right of the item on the reading list the digitisation is linked to
- It will only appear in the time from the start date to the end date of the digitisation
- If the digitisation bundle is opened before the digitisation start date, it will open to a blank page with the message: 'This digitisation is not available'. It will become available on/after the start date.
A poor quality PDF can be replaced by a bett er PDF, while the request is Live.
(Rather than withdrawing the request and creating a new one)
Open the request in Talis:
- Click 'Actions' in the top right

- Select 'Upload new copy'
In the Replace request screen:
- Enter new pages numbers if they have changed
- Enter Section author(s) if any or missing
- Click 'Choose file' and add the better scan
- Do not add a coversheet
- Enter the 'Reason for replacement'
- eg. OCR applied
- eg. Pages straightened
- eg. Unneeded pages removed
- Do not tick the boxes
- Click 'Replace'

Metadata that can be edited on a live request page by clicking includes:
- Title
- Author(s)
- Section name
- Publisher
- Requester name
- Requester email
- Section author(s) (only if originally added)
- Edition (only if originally added)
- Minor material type (through the 'Actions' menu)

Metadata that cannot be edited on a live request by clicking includes:
- Resource type
- ISBN
- Start date
- End date
- Course Name
- Course Code
To correct this metadata, or add missing metadata to the live request:
(Rather than withdrawing the request and creating a new one)
- Click 'Actions' in the top right
- Select 'Replace request'

On the New request form:
- Enter your metadata corrections
- Click 'Submit'
To apply the changes - click 'Complete replacement'
- You have the option to 'Upload new copy' at this point also
- The 'Replace request' function does not affect the request's link to a reading list
- When the replacement is finished, the box will say: 'Request success'.
To correct page numbers, you need to withdraw the digitisation, and create a new request
Note: once a request is linked to a reading list item, it cannot be unlinked and relinked to a different reading list item.
If a digitisation is linked to the wrong place, withdraw the digitisation, and request a new one from the correct place.
- Change the requester email address to your own
- Click 'Actions' and select 'Withdraw request' in the drop down
- Add the reason 'linked to incorrect reading list / list item'
- Find the reading list item you would like the digitisation to be linked to, and submit a new digitisation request
All automated actions and manual actions are recorded in the worklog below the request information
7. Checking for Broken Links
Housekeeping is necessary to check if digitisations:
have broken links to reading list items- are not linked to any reading list item
To check if any links are broken between Digitisations and Course Resource lists:
- In Talis:
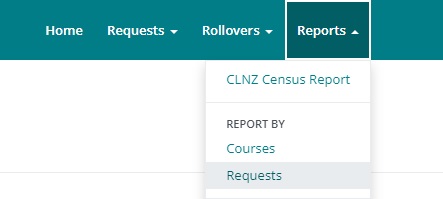
- Click 'Reports' in the menu bar
- Select 'Requests' under 'Report by'
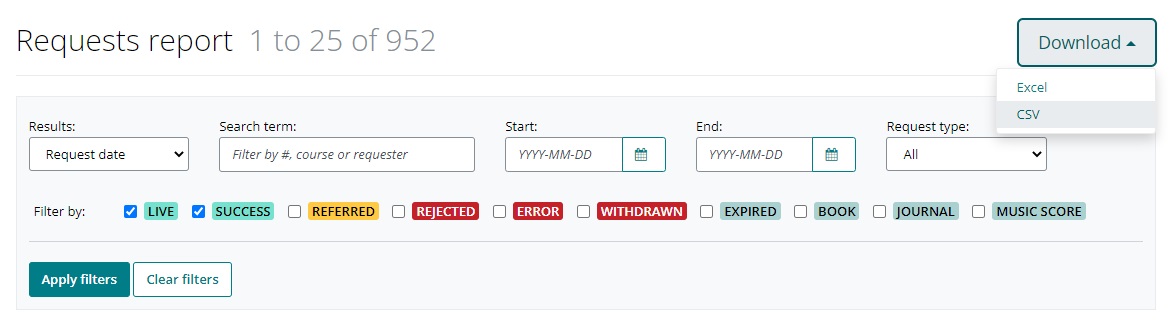
- Untick 'Expired' (only LIVE and SUCCESS ticked)
- Click 'Apply Filters'
- Click 'Download' in the top right, and select CSV
- Go to the Sharepoint folder: Digitisation checking
- check the following are in the folder:
- _Talis broken link check.exe
- CsvHelper.dll
- Results folder
- sync the folder to your device for ease of access (if not already synced)

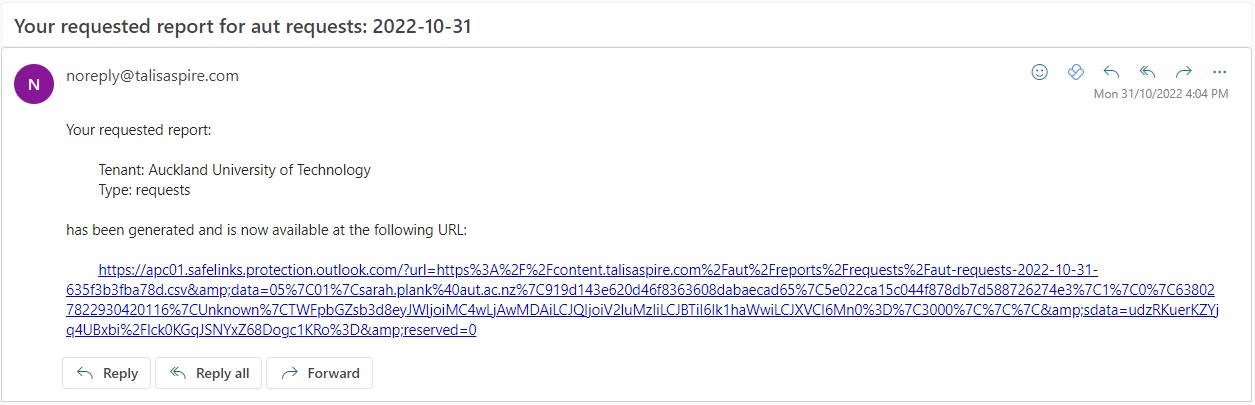
- Go to your email inbox:
- Open the email from noreply@talisaspire.com
- Click the URL link
- Save the download file into the synced Digitisation checking folder
- do not rename the file (eg. aut-requests-YYYY-MM-DD-123a4b5cd67e.csv )
- make sure the file is saved in the .csv format type
- In the synced Digitisation checking folder
- Right click the download file eg. 'aut-requests-YYYY-MM-DD-123a4b5cd67e.csv'
- Select rename, copy the file name
- Open the _Talis broken link check.exe application
- Paste the file name after 'Please input the CSV file name:'
- Type .csv at the end of the file name and press enter.
- Wait for the process to finish. It may take up to 10 minutes.
- You can continue to do other work while it runs in the background

- When the process has finished, the list will stop with the message: 'All completed'

- Scroll through the list
- Take note of the ID numbers of requests that have not 'passed'
- Make a list of requests with 'No URL found' (yellow)
Make a list of requests with 'Error' (red)

To fix any links that are broken between Digitisations and Course Resource lists:
- In Talis:

- Click 'Requests' in the menu bar
- Select 'All requests' at the top
- In the filter 'Search by', type a noted ID number
- Open the request by clicking the ID number to the left

- Requests that had the status 'No URL found' in the report, need to be linked to a reading list item

- Note the Hierarchy/Course Code of the request
- Note the teaching period of the request based on the start and end dates
- Check the Time Periods Chart if you are unsure
- Go to Course Resources
- Search for the Hierarchy/Course Code of the request
- Select the list result with the teaching period that matches the request dates
- Use the 'Search' filter at the top right to find the item the digitisation is for
- Click the three dots button to the right of the resource
- Select 'Share item' at the bottom of the drop down
- In the pop-up, click the copy button to the right of the link
- Return to the Talis digitisation request:
- In the bottom right, click the option 'Link to reading list item'
- Paste the link copied from the Course Resource list
- Return to the Course Resources list:
- Refresh the page, find the reading list item again
- Check that a 'View Online' button has appeared to the right of the item
- Click the 'View Online' button to make sure the digitisation is accessible
Requests that had the status 'Error' in the report, need to be removed and/or replaced
Right click 'View item in reading list' near the bottom right, and open in a new tab
If an Error! screen appears, the list item the digitisation was linked to has been deleted
Return to the Talis digitisation request, and change the email address to your ownClick 'Actions' and select 'Withdraw request' in the drop downAdd the reason 'reading list item deleted' and click 'Withdraw request'
If a Course Resources list appears, check the teaching period eg. SEMESTER 2 2022
If the list has a past teaching period:Withdraw the digitisation with the reason: 'linked to incorrect reading list'Find the list for the current teaching period, find the item on the list, and submit a new digitisation request
If the list has the current teaching period:Check how many lists have been created for the time period by clicking the list's Hierarchy/Course CodeIf there are multiple lists for the current time period, find out which is the 'real list'Withdraw any digitisations linked to the duplicate listRe-request the digitisations through the 'real list'When you are finished, open the duplicate list, click Edit and select 'Archive list'
If there is only one list, contact the Course Resources Specialist to investigate
- After all the missing
/brokenlinks have been addressed:
- move the ''aut-requests-YYYY-MM-DD-123a4b5cd67e.csv' file to the Results folder
- download and run a new report to check all the requests now return the status: Passed
Please contact the Course Resources Specialist if a broken link is unable to be fixed by these methods.
8. FAQs
Can a digitisation be unlinked from a reading list item and then relinked to another?
No. Once a digitisation is linked to a reading list item, it cannot be unlinked or relinked.
The only option is to withdraw the digitisation, and create a new request that is correctly linked.
Can two courses have the same digitisation in the same teaching period?
Yes. As long as they have separate hierarchy/course codes.
Can a chapter from a book be uploaded, then later removed, so another chapter from the book can be uploaded?
No. Only one chapter or up to 10% of a book can be copied per course per teaching period.
A chapter can only be removed and replaced by another if it had not yet been used for the course.
Can an interloaned copy be uploaded as a digitisation?
Yes. As long as the digitisation is uploaded with 'Other HEI' declared as the source.
Can I scan/upload more than one article from the same journal issue for the same course?
Yes. A maximum of two articles can be scanned as long as they are on the same subject.
Can I scan/upload a different chapter from different editions of the same book?
Yes. As long as each edition has a different ISBN.
Can an entire book/journal be scanned in readiness for parts of it being requested at a later date?
No. You can only scan the requested portion of the book/journal at the time it is requested.
Does changing the metadata of reading list item also update the metadata of the digitisation linked to it?
No. Editing the metadata of a reading list item does not affect the metadata of the digitisation request - or vice versa.
Why is a request not being automatically fulfilled when a copy has been previously uploaded for another course?
A request will only be automatically fulfilled if all the metadata is exactly the same as a previously fulfilled request.
If one detail is different - eg. an extra page or different publication year - the request will not automatically fulfil.
If the requests are identical, but the Concierge has not recognised this; manually fulfil the request by downloading the PDF copy from the previous request and uploading it to the new request. You do not need to scan or source the item again.
How to find or create a permalink, ezproxy link, or stable link?

A permalink is often represented by a 'linked chain' symbol.
Clicking this icon on a webpage will present the permalink to copy.
An ezproxy link can be created if a permalink is not available.
Copy the DOI number, and paste it directly after the forward slash at the end of this link:
http://ezproxy.aut.ac.nz/login?url=http://dx.doi.org/
A stable link is often named 'Stable URL'.
Like a permalink or ezproxylink, this will not break, ensuring long-term access to a resource.