Create a reference manually
You can manually enter publication details to EndNote to create a reference. You'll need to create a manual reference for items that don't have a database record that you can import into EndNote.
- Click the add new reference icon on the EndNote library toolbar.

- Alternatively, you can select Reference > New Reference, or use the keyboard shortcut <Ctrl+N> (PC) or <Cmd+N> (Mac).
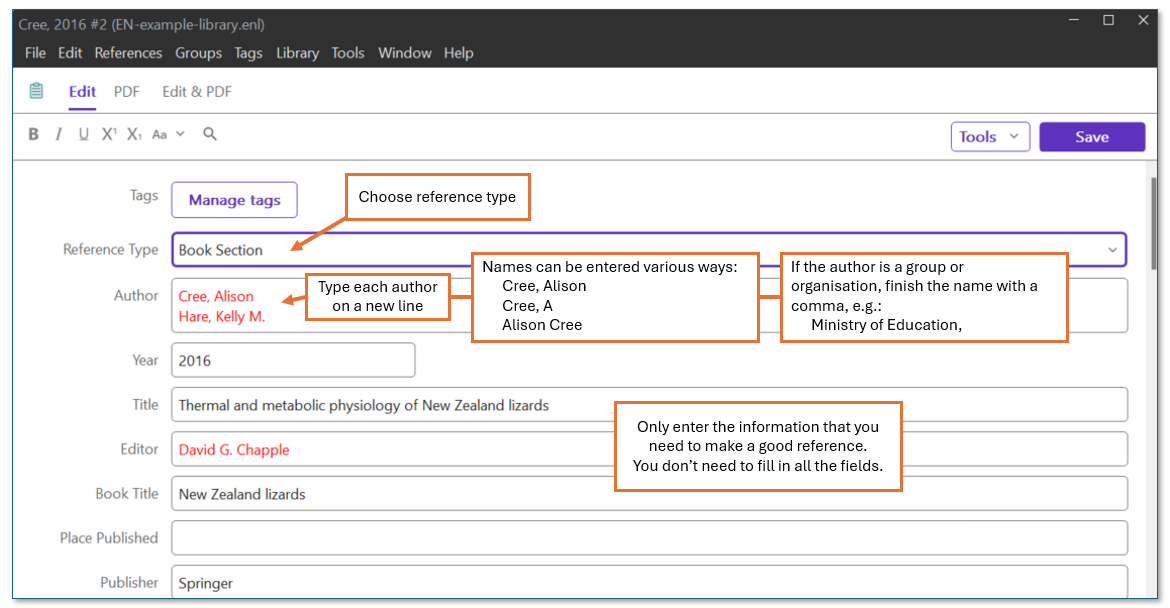
Important: by default the New Reference window will be the template for a Journal Article.
- If your item is not a journal article, click the drop-down arrow next to Reference Type and select the appropriate option.
- Enter details in the fields required for a reference.
- Choose Save and close the New Reference window.
- Highlight your newly entered reference in All References, then check the Preview in the Summary panel to review how it will appear in your selected reference style.
Tips for problem-free manual entry
-
If you have a number of articles written by an author in your library, make sure all references use the same full name (for example, do not use N Smith in one record, and Nick Smith in another).
-
Spelling and capitalisation must be entered correctly. EndNote will not correct spelling or capitalisation for you. Check the APA 7th Referencing guide (or a guide to the style you are using) if you are unsure what capitalisation rules to use.
-
Avoid entering an extra space in each field, such as an extra space at the end of the title. This will create incorrect punctuation or missing punctuation in the reference.
-
For corporate or group authors, e.g., a report by Creative New Zealand, you must add a comma directly after the last letter of the name, like this:
Creative New Zealand,
Export from Library Search
- Keep your EndNote Library open in the background.
- Go to the Library website and use Library Search to search the Library's resources.
- Search results are grouped into two collections: Books & media and Articles & more.
- Select See all results for a collection.

- Select the references you want, click Export.
- You can also click Save to save selected items to your AUT library account (login required) and export references from there.
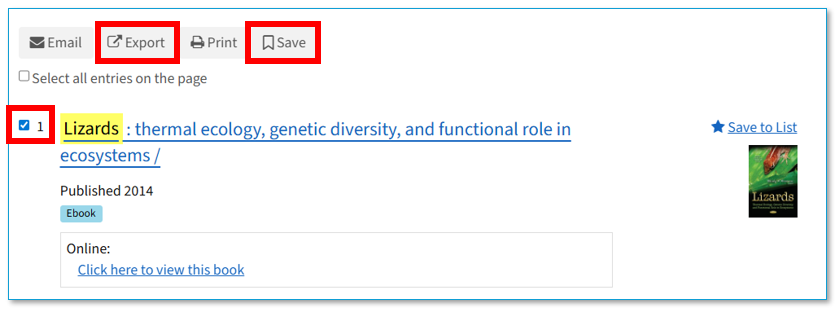
- The Export option RIS works best. Click Export.
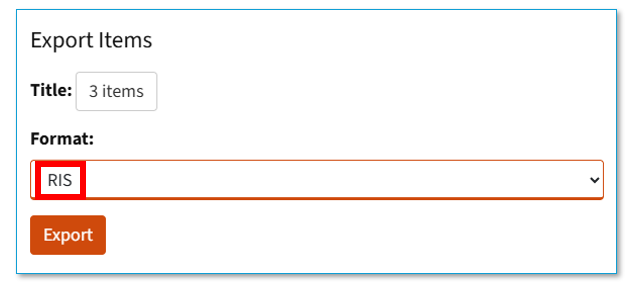
- Click Download file in the next popup box.
- Double click the downloaded file showed on your browser.
- The references will download into your EndNote Library.
- Check each reference preview in the Summary panel and use the Edit panel to make any changes necessary.
Export from Library databases
Most of AUT Library's databases support the direct exporting of references. Although the location of export commands and labels varies by database, the overall process is largely the same:
- Keep your EndNote library open in the background.
- Search a database and select the references you want to export from the results list.
- Find an export button (usually labelled Export or Cite).
- Choose an EndNote or RIS export option.
- Note: In some databases, such as Scopus, you will also need to log in with a free personal account to export references.
Example from Scopus

- An export file will be downloaded.
- If the export file does not automatically open, click or double-click the file to open it (the file is usually in your downloads bar or downloads folder).
- The newly exported references will be added to the All References folder in the left column of your EndNote Library.
- For convenience, they also appear in a temporary folder called Imported References. This folder contains the last group of references that you imported.
- Check each reference in the Summary panel.
- Edit the references as needed.
Export from Google Scholar
Export a single reference
-
Keep your EndNote library open in the background.
- Search AUT Google Scholar (on the Library website).
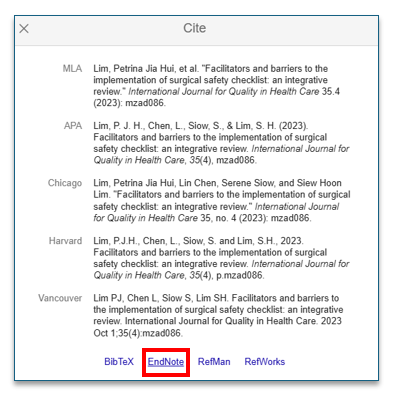
- Click the Cite button under the record you want to export, and choose the EndNote option.
- An export file will be downloaded.
- If the export file does not automatically open, click or double-click the file to open it (the file is usually in your downloads bar or downloads folder).
- The newly exported reference will be added to the All References folder in the left column of your EndNote Library.
- For convenience, it will also appear in a temporary folder called Imported References. This folder contains the last reference or group of references that you imported.
- Check the reference in the Summary panel.
- Edit the reference as needed.
Export multiple references
- You will need to be logged in with a personal Google account.
- From your search results in AUT Google Scholar, select the references you want to export by clicking the Save button (star icon) under each one to add them to My Library in your Google account. You can assign them a label to keep similar topics together.
- Choose My Library in your Google account and select the references to be exported.
- Follow the instructions above on opening the export file in EndNote.
Import pdf file to create reference
Some pdf files of articles can be imported so that EndNote automatically creates a reference for them in your Library with the pdf attached.
The pdf must be:
- publisher-generated (downloaded from a database, and preferably have a DOI)
- saved on your computer
Windows/PC
In EndNote, File > Import > File. In the Import File dialog box:
- Set the Import Option to PDF
- Select Choose, navigate to the pdf saved on your computer and select Open.
- Select Import.

Mac
In EndNote, File > Import. In the Import dialog box:
- Select Options at the bottom left of the box and set the Import Options to PDF File or Folder
- Select Choose, navigate to the pdf saved on your computer and select Open.
- Select Import.
A reference record should be saved to your EndNote library. The paperclip icon next to the reference in the main panel shows you that there is a pdf attached to it.
Check the reference preview to verify that the reference details were imported correctly
- If elements of the imported reference are missing or incorrect, you can change them in the Edit tab.
- If the Title of the record is just the pdf filename in angle brackets < >, EndNote was unable to import reference details. You will need to enter the missing data manually in the Edit tab.
Import a folder of pdfs
You can import a folder of pdf documents to your EndNote Library rather than importing each one individually. Each pdf will generate a reference.
Windows/PC
- Open your EndNote library, click File > Import > Folder
- Choose the folder from your computer and click Import
- Check each record to ensure the reference is correct. Generated references vary in quality, editing may be required
Mac
- Choose File > Import and click Options in the bottom left of the window
- Under Import Options, choose PDF Folder as a Group Set > Import
- Check each record to ensure the reference is correct. Generated references vary in quality, editing may be required
Importing pdfs automatically
You can set up EndNote to automatically import pdfs from a default folder on your computer.
- Create a default folder on your computer, and save pdf documents you wish to import into EndNote to this folder
- Open your EndNote, go to Edit > Preferences > PDF Handing

- Click Enable automatic importing
- Click Select folder, navigate to the default pdf folder and select it
- (Windows/PC) Click OK
- (Mac) Click Save
- Any new pdfs added into this folder will be automatically imported into your EndNote library. References will be created (as long as the pdfs have a DOI) and the pdfs will be attached to references
- Generated references vary in quality, editing may be required